First its important to understand what a boundary is and why we set them up. Microsoft defines a boundary as a network location on the intranet that can contain one or more devices that you want to manage. Boundaries can be an IP subnet, Active Directory site name, IPv6 Prefix, or an IP address range, and the hierarchy can include any combination of these boundary types.
Each boundary represents a network location in System Center 2012 Configuration Manager, and it is available from every site in your hierarchy. A boundary does not enable you to manage clients at the network location. To manage a client, the boundary must be a member of a boundary group, which is a collection of boundaries. Boundary groups help clients on the internet find their assigned site and locate content available for install such as software, applications and windows updates as well as operating system images.
Configuration Manager does not support the direct entry of a supernet as a boundary. Instead, use the IP address range boundary type. When Active Directory Forest Discovery identifies a supernet that is assigned to an Active Directory site, Configuration Manager converts the supernet into an IP address range boundary.
A few things have changed relating to boundaries since SCCM 2007:
- Boundaries are no longer site specific, but defined once for the hierarchy, and they are available at all sites in the hierarchy.
- Each boundary must be a member of a boundary group before a device on that boundary can identify an assigned site, or a content server such as a distribution point.
- You no longer configure the network connection speed of each boundary. Instead, in a boundary group you specify the network connection speed for each site system server associated to the boundary group as a content location server.
So lets go ahead and take a look at boundaries. In the Admin space expand Hierarchy Configuration and Click Boundaries. Now you will remember when we did the Active Directory Forest Discovery we told it to automatically create site boundaries so you should see at least one already made for you. In a production environment you could potentially see several which is a good thing because you did not have to create them manually.

So Right Click on Default-First-Site-Name and Select Properties then go to the Boundary Groups tab you will see that this Boundary is not a member of any groups.

In the navigation tree, Click Boundary Groups then Click Create Boundary Group

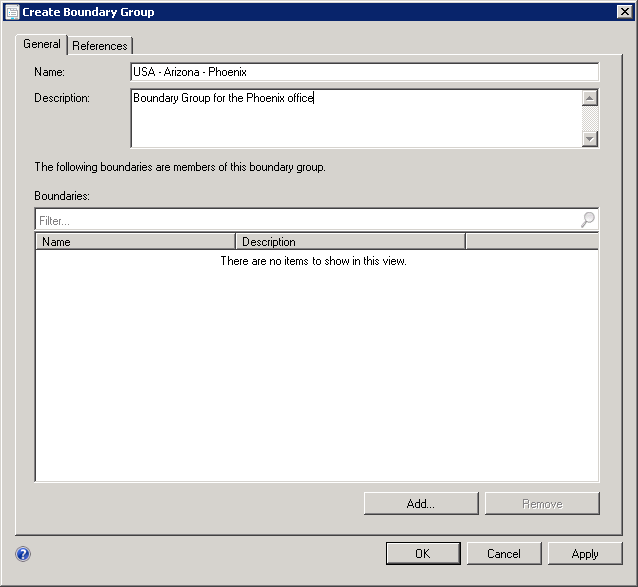
The Create Boundary Group wizard will open. Now to help you out later I would think geographically when designing your boundary groups. For instance I used USA - Arizona - Phoenix in the example here to define a boundary group for the Phoenix office. You could use other countries, states and cities to define your groups as well and this will help you visualize the distinction between them as the hierarchy expands out. Click Add
You will see our Default-First-Site-Name is available (as well as any others that may have been discovered), go ahead and check it and Click OK

Click on the References tab. If you are setting up Site specific boundary groups as discussed earlier then you will want to check the Use this boundary group for site assignment and enter the site server you are assigning the group to. In our case we only have one site server so we use 001-Lab Site.

You also want to associate the Content location to the boundary group so Clients know which distribution point and which state migration point to connect to. You can assign multiple servers in Content location. Click Add and select the server(s) that are applicable in your situation. Click OK

Click OK

You will see your newly created boundary group updated on the list.

To verify the boundary settings go back into Boundaries and pull up the properties of Default-First-Site-Name. If you look under the Boundary Groups tab you should see the boundary group assigned similar to this.

More to come!
If you like this blog, give it a g+1
Contributing documentation:
Technet,
No comments:
Post a Comment