Once you have your Management servers up and running and you have some management packs installed you should be getting alerts in the
Active Alerts view in the
Monitoring space. I have found that this is the time to start considering resolution states and how to leverage them for your enterprise.
By default there are two out of the box states,
New and
Closed. You can use resolution states as part of your event management and alert notification process. I will give you a couple scenarios to consider when using resolution states.
Scenario 1:
You are one of many members in your Enterprise support team. Your environment is heavily siloed between the technology verticals and you are leveraging SCOM 2012 as your single pane of glass solution for monitoring (Good choice btw!). Now you want to be able to classify incoming events in a priority fashion so that when an event comes it that effects multiple silos you would want all of the respective people to be notified. So say your SQL server goes down and as a result takes down SharePoint and an IIS transaction database. Three or more teams can be notified by leveraging resolution states and subscriptions.
- Priority1 - Highest Priority, 24x7x365 monitoring, all hands notification
- Priority2 - Mid Level Priority, 24x5 (M-F) monitoring, targeted notification
- Priority3 - Lower Level Priority, 8x5 (M-F during business hours) monitoring, admin only notification
Scenario 2:
You are a small IT shop watching a handful of servers and a modest amount of desktops. There are only a few of you working events and want to be able to keep track of who is working on what issues. You can use resolution states as a task identifier to let others know what you are working on. So in addition to New and Closed you can use:
- Assigned to Steve
- Assigned to Fred
Now you know that a new alert has been seen by one of your co-workers and is currently being addressed.
You can create up to 254 different types of resolution states so you can mix and match or come up with an entirely new system that fits the needs and requirements of your organization.
To create new resolution states open the Operations Manager console and go to the
Administration Space. Then go to
Settings and
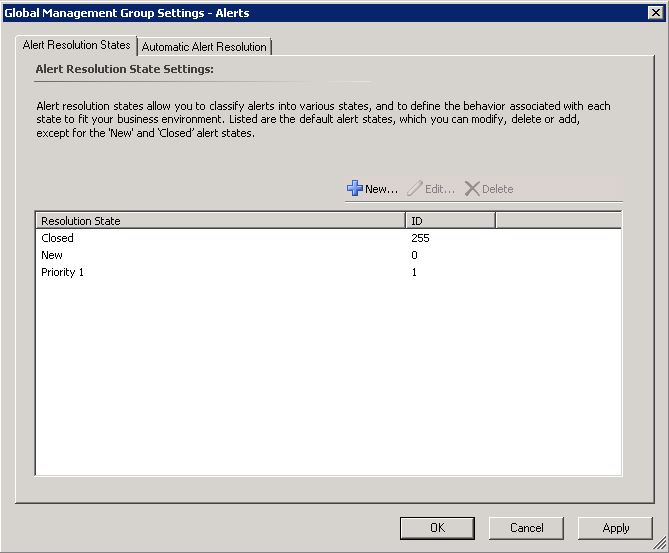
Double Click on Alerts. You can see the two default resolution states
Closed and
New.
Click New
The Add Alert Resolution State window will come up and you can enter in a name for your new state.
Click OK when done
You return to the Global Management Group Setting and can see our new state appears in the list.
Click OK to close out of this window
To assign resolution states to an alert go to your
Monitoring space and
Click Active Alerts.
Right Click on the alert you want to set your new state to and
Select Set Resolution State then your new state.
You will return to the Active Alerts list but you will notice that the Resolution State for that alert has changed to Priority 1. Now all incoming alerts of this time will be assigned to this priority.
You can now use this priority to create alert subscriptions which I will cover in another segment.