Friday, December 21, 2012

Virus Alert - Win 7 Defender

I just found out today about a new virus that is going around called Win 7 Defender. It is a scareware virus that is designed to look like a legitimate anti-virus program but actually only provides false security warnings. It is spread by masquerading as a program that requires viewing an online video and once installed it modifies your .exe file associations to point to the Win 7 Defender interface.
Once installed it will pretend to scan your machine and present you with multiple false positive infections on your PC. If you try and remove these infections it will state that you need to purchase the program before you will be able to execute the removal. Under NO circumstances should you do so! This virus was created for one reason, to scare you into thinking you are infected so you will purchase the program.

Removal Process:
  1. From a clean computer download Rkill here. Save this file to a thumb drive so you can copy it to the infected computer
  2. Restart the infected computer in Safe Mode with Networking. You do this by pressing the F8 key during the start-up process as soon as you see anything on the screen. 
     
  3. Once the computer has booted plug in the flash drive and run Rkill. This will terminate the Win 7 Defender process so you can safely remove it.
  4. Now you should download and install Malwarebytes Anti-Malware (if you do not already have it)
  5. Once installed it will automatically run and offer to scan your PC. Make sure you run a FULL scan.
  6. When the scan completes you will be asked to view the results Click OK
  7. You will be taken to a screen that shows all the infected files. Check all files and Click Removed Selected
  8. Close Malwarebytes and Restart your PC in normal mode and the virus should be gone.
My advice is be careful on the links you click on especially from suspicious email's. Delete it and be safe, not sorry!
Additional Information:
Associated Win 7 Defender Files
  • %AllUsersProfile%\Desktop\Win 7 Defender.lnk
  • %CommonAppData%\pcdfdata\
  • %CommonAppData%\pcdfdata\<random>.exe
  • %CommonAppData%\pcdfdata\app.ico
  • %CommonAppData%\pcdfdata\config.bin
  • %CommonAppData%\pcdfdata\defs.bin
  • %CommonAppData%\pcdfdata\support.ico
  • %CommonAppData%\pcdfdata\uninst.ico
  • %CommonAppData%\pcdfdata\vl.bin
  • %CommonStartMenu%\Programs\Win 7 Defender\
  • %CommonStartMenu%\Programs\Win 7 Defender\Remove Win 7 Defender.lnk
  • %CommonStartMenu%\Programs\Win 7 Defender\Win 7 Defender Help and Support.lnk
  • %CommonStartMenu%\Programs\Win 7 Defender\Win 7 Defender.lnk
File Location Notes:
  • %AllUsersProfile% refers to the All Users Profile folder. By default, this is C:\Documents and Settings\All Users for Windows 2000/XP and C:\ProgramData\ for Windows Vista/7.
  • %CommonAppData% refers to the Application Data folder for the All Users Profile. By default, this is C:\Documents and Settings\All Users\Application Data for Windows 2000/XP and C:\ProgramData\ for Windows Vista/7.
  • %CommonStartMenu% refers to the Windows Start Menu for All Users. Any programs or files located in the All Users Start menu will appear in the Start Menu for all user accounts on the computer. For Windows XP, Vista, NT, 2000 and 2003 it refers to C:\Documents and Settings\All Users\Start Menu\, and for Windows Vista/7/8 it is C:\ProgramData\Microsoft\Windows\Start Menu\.
  • %CommonAppData% refers to the Application Data folder in the All Users profile. For Windows XP, Vista, NT, 2000 and 2003 it refers to C:\Documents and Settings\All Users\Application Data\, and for Windows Vista/7 it is C:\ProgramData.
Effected Registry Settings:
  • HKEY_CLASSES_ROOT\.exe "(Default)" = "<random>"
  •  HKEY_LOCAL_MACHINE\SOFTWARE\Microsoft\Windows\CurrentVersion\Uninstall\pcdfdata
  • HKEY_CURRENT_USER\Software\Classes\.exe\shell\open\command "(Default)" = ""%CommonAppData%\pcdfdata\<random>.exe" /ex "%1" %*"
  • HKEY_CURRENT_USER\Software\Microsoft\Windows\CurrentVersion\Run "pcdfsvc" = "%CommonAppData%\pcdfdata\<random>.exe /min"

More to come!

If you like this blog give it a g+1

Wednesday, December 19, 2012

AD 2008R2 - Remove Users From Local Admin Using Group Policy

So one of the more frustrating things to deal with as a system admin is managing local user permissions on desktops and servers. People with local admin rights can do just about anything to their local machines which can cause significant headache to the Help Desk team. In 2008R2 Active Directory Microsoft has given administrators the ability manage local system groups via GPO. In this segment I plan to cover some of the highlights of this policy.

Create the GPO:
On your Domain Controller go ahead and open up Group Policy Management. Drill down to the domain where you want to create the policy and expand Group Policy Objects. Right Click in the active window and Select New. Lets call the GPO Local Users. Click OK

Edit the GPO:
You should see the newly created GPO in the active window. Right Click on it ans Select Edit. In the Group Policy Management Editor Drill down to User Configuration > Preferences > Control Panel, then Right Click on Local Users and Groups. Select New > Local Group

In the New Local Group Properties window in Action: select Update. For the Group name: type in Administrators. Select the Remove the current user radio button and Click OK
*Note - In addition to removing the current users you can use this to add users, delete all users and delete all groups. Be careful how you set this up as you may inadvertently remove users or groups you want to keep.

Your newly created element should appear in the active window. Go ahead and close the editor.

Apply & Test the GPO:
Next we need to apply the GPO to the OU that that has the computers which will receive it.

*Caution - You should test all GPO's in a lab environment or on a Test OU BEFORE applying them to the live production environment to ensure you will achieve the desired outcome.

In the navigation tree simply drag the Local Users GPO to the computer group you want it to be applied to. You will be prompted to link the GPO to the OU. Click OK

The final step is to test the GPO. Log into a machine that is in the OU you applied the GPO to and open a command prompt. Run the following:
gpupdate /force
Go into Administrators under Local Users and Groups and you should see the the user has been removed from the group.


More to come!

If you like this blog give it a g+1

Tuesday, December 18, 2012

AD 2008R2 - Setting Local Administrator Password via GPO

When you are managing a large environment, changing the local administrator password on a regular basis can be challenging. There are various tools out there and you can do it with scripting but the easiest way to do it is by using Group Policy. In this segment I am going to walk through the process of setting up the GPO.

Create the GPO:
On your Domain Controller go ahead and open up Group Policy Management. Drill down to the domain where you want to create the policy and expand Group Policy Objects. Right Click in the active window and Select New. Lets call the GPO Local Admin PW. Click OK

Edit the GPO:
You should see the newly created GPO in the active window. Right Click on it and Select Edit. In the Group Policy Management Editor, drill down to Computer Configuration > Preferences > Control Panel Settings > Local Users and Groups. Right Click on Local Users and Groups and Select New > Local User.

For the Action Select Update. In the User name: type Administrator. Type and Confirm the new password you want applied. Uncheck all but Account never expires and Click OK
*Note - This is also a great way to get rid of any local accounts that are out there that are no longer needed. Under Action Select Delete, enter the account name then continue with the steps below.

Back on the Group Policy Management Editor you will see the new Administrator user element has been created in the Active Window. Go ahead and close this and go back to Group Policy Management.

Apply & Test the GPO:
Next we need to apply the GPO to the OU that that has the computers which will receive it.

*Caution - You should test all GPO's in a lab environment or on a Test OU BEFORE applying them to the live production environment to ensure you will achieve the desired outcome.

In the navigation tree simply drag the Local Admin PW GPO to the computer group you want it to be applied to. You will be prompted to link the GPO to the OU. Click OK

The final step is to test the GPO. Log into a machine that is in the OU you applied the GPO to and open a command prompt. Run the following:
gpupdate /force

Log out of the computer and log back in as the Administrator using the new password.


More to come!

If you like this blog give it a g+1

Wednesday, December 12, 2012

AD 2008R2 - GPO for Adding a Security Group to Local Administrators

There are times where you will have a default security group which needs access to all the servers in a particular domain or an organizational unit. In AD 2008R2 you can create a group policy that will automatically deploy this security group to all the servers or computers in a particular group.

Create a Security Group:
The first thing we need is to create a new Security Group to assign to the GPO. In Active Directory Users and Computers Right Click in the organizational unit where you want to create this new security group and Click New and then Group from the flyout. Lets call this group Server Admins. This group should be a Global Security Group.
Once the group is created Double Click on it and go to the Members Tab. Go ahead and add the users that you would like to be in this group and Click OK
 
Create a GPO:
Now that we have our Security Group ready lets create the GPO. Open Group Policy Management and drill down to the domain you would like to create this GPO in and expand Group Policy Objects. In the active window Right Click and select New. Lets call this GPO Local Administrator. Click OK and you should see the new GPO you just created.
 
Modify The GPO:
In the navigation tree Right Click on your newly created GPO and select Edit. In the Group Policy Management Editor drill down to Computer Configuration\Policies\Windows Settings\Security Settings\Restricted Groups. In the active field Right Click and select Add Group. You can Click Browse to locate the security group you just created and Click OK

You will be prompted to apply properties to this group. Under This group is a member of: Click Add and Click Browse. Add Administrators and Remote Desktop Users. Click OK
*Gotcha - If you change Members of this group: you will overwrite the users you added to the group in the Create a Security Group step above.

*Note -The group selection is dynamic. If you add a group called Butterfly, the security group will be added to any server that has a local group called Butterfly

You will see the new security group added to the GPO and the group memberships as well.

Apply & Test the GPO:
Next we need to apply the GPO to the OU that that has the computers which will receive it.

*Caution - You should test all GPO's in a lab environment or on a Test OU BEFORE applying them to the live production environment to ensure you will achieve the desired outcome.

In the navigation tree simply drag the Local Administrator GPO to the computer group you want it to be applied to. You will be prompted to link the GPO to the OU. Click OK

The final step is to test the GPO. Log into a machine that is in the OU you applied the GPO to and open a command prompt. Run the following:
gpupdate /force
Go into Administrators under Local Users and Groups and you should see the newly created Security group.


More to come!

If you like this blog give it a g+1

Tuesday, December 11, 2012

SCOM 2012 - Install Hangs at Importing System Network Management MP

I have only actually seen this happen one time. You are going through and doing an install of SCOM 2012 and it hangs indefinitely on Importing System Network Management Management Pack in the Operational database configuration portion of the install.

You will eventually see in the OpsMgrSetupWizard.log file:
[18:06:54]:    Error:    :ImportManagementPack: Unknown Error. Microsoft.EnterpriseManagement.Common.ServerDisconnectedException : The client has been disconnected from the server. Please call ManagementGroup.Reconnect() to reestablish the connection.
[18:06:54]:    Always:    :FirstManagementServer: Failed to load MP D:\Setup\AMD64\..\..\ManagementPacks\System.NetworkManagement.Library.mp.  We will retry.
[18:06:55]:    Always:    :ImportManagementPack: Loading management pack D:\Setup\AMD64\..\..\ManagementPacks\System.NetworkManagement.Library.mp. 18:06:55
And this will repeat multiple times. I eventually had to kill the install because it never went through successfully.

Now you will remember that I covered the install prerequisites in SCOM 2012 - Installation. In this segment we covered how to use the GUI and install SCOM correctly. The order of operations I had illustrated was to install .NET 3.5, .NET 4.0, Enable the Remote Registry service and then install Microsoft Report Viewer 2010. Now if you were planning on running Web Services on this machine as well, and if you installed IIS after .NET 4.0 it will not register properly with IIS. If this happens it will freeze up your install during the System Management MP import, so you need to re-register .NET 4.0 with IIS by running the following command:
%WINDIR%\Microsoft.NET\Framework64\v4.0.30319\aspnet_regiis.exe -r

Once .NET 4.0 is re-registered with IIS you should be able to run through the install without issues.


More to come!

If you like this blog give it a g+1

Contributing Documentation:
Technet

SQL 2008R2 - SP1 Install

Recently had to do an upgrade on one of my SLQ 2008R2 servers to SP1 so I thought I would walk through the process and the steps I took to do this upgrade. First we need to get a copy of SQL 2008R2 SP1 which is available from the Microsoft Download Center. Once we have it we need to log into our SQL server with local admin privileges. Right Click on the SQLServer2008R2SP1-KB2528583-x64-ENU.exe file and Run as Administrator. The installer will kick off and automatically run the rule checker. When that finishes Click Next

Go ahead and accept the EULA and Click Next

You will be prompted to select which database instances you want to upgrade. In my case I selected everything. Click Next

The installer will check to see if there are any files in use. If it identifies any you will need to stop the related applications or services. Click Next

Review your install selections and Click Update

You can monitor the install progress which could take some time depending on how many instances you will need to update.

Success!


More to come!

If you like this blog give it a g+1

Friday, December 7, 2012

SCOM 2012 - Agent Causing High CPU Utilization

So I ran into an interesting situation not too long ago. I was just wrapping up a deployment when one of the people I was working with came to me with a performance issue. He had noticed that there were a few of the servers being monitored by SCOM that were experiencing an issue with high CPU utilization. The CPU was flapping about every five minutes or so as shown in the perf-mon in figure 1. I was a bit surprised to hear this because everything I had read up to this point about SCOM 2012 had indicated that Microsoft had slimmed down the agent profile to run thinner and lighter then its predecessors.
Fig. 1
After some discussion I asked him to disable the SCOM agent and do a follow up perf-mon and the results are below in figure 2. The CPU went from a flapping state to almost null.
Fig. 2
This was quite strange. I had to do some digging to see if anyone else had come across the same thing. As it turns out there have been some an update to the BaseOS MP to run utilization scripts. One of the things that changed in this new management pack was the addition of a script which runs to provide an output on network utilization. There are three monitors and three rules for 2003 and 2008 that use this new script.

2003
Monitors
  •  Microsoft.Windows.Server.2003.NetworkAdapter.PercentBandwidthUsedReads (Percent Bandwidth Used Read)
  •  Microsoft.Windows.Server.2003.NetworkAdapter.PercentBandwidthUsedWrites (Percent Bandwidth Used Write)
  • Microsoft.Windows.Server.2003.NetworkAdapter.PercentBandwidthUsedTotal (Percent Bandwidth Used Total)
Rules
  • Microsoft.Windows.Server.2003.NetworkAdapter.PercentBandwidthUsedReads.Collection (Percent Bandwidth Used Read)
  •  Microsoft.Windows.Server.2003.NetworkAdapter.PercentBandwidthUsedWrites.Collection (Percent Bandwidth Used Write)
  • Microsoft.Windows.Server.2003.NetworkAdapter.PercentBandwidthUsedTotal.Collection (Percent Bandwidth Used Total)
2008
Monitors
  •  Microsoft.Windows.Server.2008.NetworkAdapter.PercentBandwidthUsedReads (Percent Bandwidth Used Read) 
  •  Microsoft.Windows.Server.2008.NetworkAdapter.PercentBandwidthUsedWrites (Percent Bandwidth Used Write) 
  • Microsoft.Windows.Server.2008.NetworkAdapter.PercentBandwidthUsedTotal (Percent Bandwidth Used Total)
     Rules
    •  Microsoft.Windows.Server.2008.NetworkAdapter.PercentBandwidthUsedReads.Collection (Percent Bandwidth Used Read)
    •  Microsoft.Windows.Server.2008.NetworkAdapter.PercentBandwidthUsedWrites.Collection (Percent Bandwidth Used Write)
    •  Microsoft.Windows.Server.2008.NetworkAdapter.PercentBandwidthUsedTotal.Collection (Percent Bandwidth Used Total)
    The advantage to having this run is it allows you insight into what the network bandwidth is, but the downside is when the script runs, every five minutes by default, it consumes a great amount of CPU. The best approach is to disable the monitor and rule for Percent Bandwidth Used Total in each 2003 and 2008. Read and write are disabled by default. For more information on how to disable these rules / monitors review SCOM 2012 - Creating Overrides.


    More to come!

    If you like this blog give it a g+1

    Monday, December 3, 2012

    SCOM 2012 - How to Email Scheduled Reports

    Now that we have Web and Reporting services up and running we should talk about one of the more beneficial features of Reporting Services, the scheduled report. You can have reports automatically sent out to members of your team, or management or have them dropped into a document repository like a file share or SharePoint. This is a good way to document long term conditions of your environment as well as easily distributing daily information.

    First thing we need to do is make sure we have SSRS configured properly. We already did most of the heavy lifting in SQL 2008R2 - Configuring SSRS for SCOM 2012, but there was one step we skipped because I wanted to elaborate on it a bit more in this segment. So lets go into SSRS and go to the E-mail Settings page in the navigation tree. In Sender Address we need to put something descriptive so people will know when they are getting automated reports. In SMTP Server provide the name of your corporate SMTP server. You may need to check with your Exchange administrator for this information if you do not already have it. Also they may need to configure internal relay in order for the email to be passed through the system. Click OK and close SSRS.

    Now lets go ahead and open up the Operations Console and go into the Reporting space. In the list of available reports go ahead and find the report you want to setup a schedule for. For this example we will be using SQL Server 2005. Once selected Click Schedule on the Actions pane. From here there are a few options you can use as far as delivery method, Windows File Share, E-Mail, and Null Delivery Provider.

    For the purpose of this segment we are going to do an E-Mail delivery. When you Select E-Mail it will activate the settings menu below. Enter a valid To e-mail address. You can check the Include Report check box. In the Render Format select what format you would like to have delivered. Then choose the priority and Click Next

    For Subscription Schedule select the delivery times and frequency you require. In The subscription is effective beginning this is when the first report will be sent out. Select an appropriate date and Click Next

    Since we are doing a SQL report we will select the SQL Server 2005 Servers. Click Next

    For Report parameters select the Data Aggregation type you would like to see and Click Finish. Depending on what you set the The subscription is effective beginning you may have to wait a bit to see the first report.

    More to come!

    If you like this blog give it a g+1

    Friday, November 30, 2012

    SCOM 2012 - Exporting Agent List

    There will be times when you do a deployment where you need to validate the deployed agents against a "master list" of servers that a client has, in order to make sure that you are getting agents out to all machines. As you know using the console to do this is tedious at best. There is, however, a PowerShell command to export out the complete list of agents to a .csv file.

    To pull the agent list, open Operations Manager Shell.
    Start > All Programs > Microsoft System Center 2012 > Operations Manager Shell

    For SCOM 2007 R2:
    get-agent|export-csv -notype c:\AgentList.csv
    For SCOM 2012:
    get-scomagent|export-csv -notype c:\AgentList.csv
    This will drop a .csv file on your C:\ called AgentList and you will be able to import this into Excel and compare with your master list.


    More to come!

    If you like this blog give it a g+1

    SCOM 2012 - Deploying Agents to Untrusted Domains

    When you have gateway servers sitting in untrusted domains you can deploy agents a couple of ways. You can use the gateway server itself or you can deploy from a management group server. I recently worked on a project where we were not able to use the gateway server because of some environmental factors so we had to deploy from the management group. The following are the steps you need to take to do this. It is similar a normal deployment with a few differences.

    In the Administration space Right Click on Administration and select Discovery Wizard. Then select Windows Computers. Click Next

    Select the Advanced discovery radio button. Then chose the gateway server you want to use as the primary management server. Click Next

    In Discovery Method select the Browse for, or type-in computer names radio button In the active field enter the name(s) of the computers to be discovered (don't bother doing a browse for them, they won't be found). Click Next

    For the Administrative Account you want to use the SCOM management account for the respective domain you are deploying to. Be sure to check This is a local computer account, not a domain account to avoid credential problems. Click Discover

    You will be warned about the validation of the provided credentials, Click Yes

    Check the box(s) of the computers to deploy to, choose agent or agent-less and Click Next

    Leave the Agent action account as Local System and Click Finish

    The agents will deploy in proper time and you are all set.


    More to come!

    If you like this blog give it a g+1

    Thursday, November 29, 2012

    SCOM 2012 - Unattended Installation

    In SCOM 2012 - Installation I covered the traditional way to install SCOM using the GUI interface, and this method works just fine if you only have a few machines to build. I have found, however, when doing a larger type of engagement it is helpful to be able to setup and launch unattended installations for SCOM. When you are building half a dozen management servers and a dozen gateway servers and a web/reporting server, having unattended script files makes the install go much faster. So I thought I would go through and iterate what all the switches are as well as provide a few install samples for you.

    Please be aware that all of the prerequisites still need to be met before running the silent install.

    Switches
    Below are the switches I have been able to pull together from various sources including the Microsoft Technet article.
    Parameter Value
    /silent Does not display the installation wizard.
    /install Runs an installation. Use /components to indicate specific features to install.
    /installpath Determines the location of the installation directory.
    /components OMServer: Installs the management server.

    OMConsole: Installs the Operations console.

    OMWebConsole: Installs the web console.

    OMReporting: Installs the Reporting server.

    /ManagementGroupName: The name of the management group
    /SqlServerInstance: The SQL server and instance (<server\instance>).
    /DatabaseName: The name of the Operational database.
    /DWSqlServerInstance: The data warehouse server and instance (<server\instance>).
    /DWDatabaseName: The name of the data warehouse database.
    /UseLocalSystemActionAccount Used to specify the Local System for the Management server action account.
    /ActionAccountUser: The domain and user name of the Management server action account.

    Used if you do not want to specify the Local System

    /ActionAccountPassword: The password for the Management server action account.

    Used if you do not want to specify the Local System.

    /UseLocalSystemDASAccount Used to specify the Local System for the Data Access service account.
    /DASAccountUser: The domain and user name of the Data Access service account.

    Used if you do not want to specify the Local System.

    /DASAccountPassword: The password for the Data Access service account.

    Used if you do not want to specify the Local System.

    /DataReaderUser: The domain and user name of the data reader account.
    /DataReaderPassword: The password for the data reader account.
    /DataWriterUser: The domain and user name of the data writer account.
    /DataWriterPassword: The password for the data writer account.
    /EnableErrorReporting: Never: Do not opt in to sending automatic error reports.

    Queued: Opt in to sending error reports, but queue the reports for review before sending.

    Always: Opt in to automatically send error reports.

    /SendCEIPReports: 0 : Do not opt in to the Customer Experience Improvement Program (CEIP).

    1 : Opt in to CEIP.

    /UseMicrosoftUpdate: 0 : Do not opt in to Microsoft Update.

    1 : Opt in to Microsoft Update.

    /AcceptEndUserLicenseAgreement Used to specify that you accept the End User License Agreement (EULA). This is only required when you install the first management server in the management group.
    /ManagementServer Used to specify the name of the management server associated with a web console and/or Reporting server that is not installed on a management server.
    /WebSiteName: The name of the website. For default web installation, specify “Default Web Site”.

    Used for web console installations.

    /WebConsoleUseSSL Specify only if your website has Secure Sockets Layer (SSL) activated.

    Used for web console installations.

    /WebConsoleAuthorizationMode: Mixed: Used for intranet scenarios.

    Network: Used for extranet scenarios.

    Used for web console installations.

    /SRSInstance The reporting server and instance (<server\instance>).

    Used for Reporting Server installations.

    /SendODRReports: 0: Do not opt in to sending operational data reports.

    1: opt in to sending operational data reports.

    Used for Reporting Server Installations.


    Samples:
    These are a few examples of the unattended install scripts.

    To Install Management Servers (PowerShell)
    Start-Process -FilePath setup.exe -ArgumentList '/silent /install /components:OMServer,OMConsole /ManagementGroupName:SCOMMgmt /SqlServerInstance:SQLServer\OpsInstance /DatabaseName:OperationsManager /DWSqlServerInstance:SQLServer\DWInstance /DWDatabaseName:OperationsManagerDW /ActionAccountUser:domain\SCOMActionAccount /ActionAccountPassword:password /DASAccountUser:domain\SCOMDataAccessAccount /DASAccountPassword:password /DatareaderUser:domain\SCOMDataReader /DatareaderPassword:password /DataWriterUser:domain\SCOMDataWriter /DataWriterPassword:password /EnableErrorReporting:Always /SendCEIPReports:1 /UseMicrosoftUpdate:1 /AcceptEndUserLicenseAgreement'
    To Install IIS (PowerShell)
    Import-Module ServerManager Add-WindowsFeature NET-Framework-Core,Web-Static-Content,Web-Default-Doc,Web-Dir-Browsing,Web-Http-Errors,Web-Http-Logging,Web-Request-Monitor,Web-Filtering,Web-Stat-Compression,Web-Mgmt-Console,Web-Metabase,Web-Asp-Net,Web-Windows-Auth,Web-ASP,Web-CGI -Restart
    Please review SCOM 2012 - Web & Reporting Services Install for additional IIS configuration

    To Install Web/Reporting Services (PowerShell)
    Start-Process -FilePath setup.exe -ArgumentList '/silent /install /components:OMWebConsole,OMReporting /ManagementServer:SCOMServer /SRSInstance:Server\OpsInstance /WebSiteName:"Default Web Site" /WebConsoleAuthorizationMode:Mixed /DatareaderUser:domain\SCOMDataReader /DatareaderPassword:password /SendODRReports:1 /UseMicrosoftUpdate:1'
    To Install Gateway Services (Command Line)
    %WinDir%\System32\msiexec.exe /i path\Directory\MOMGateway.msi /qn /l*v path\Logs\GatewayInstall.log
    ADDLOCAL=MOMGateway 
    MANAGEMENT_GROUP=""
    IS_ROOT_HEALTH_SERVER=0
    ROOT_MANAGEMENT_SERVER_AD=
    ROOT_MANAGEMENT_SERVER_DNS=
    ACTIONS_USE_COMPUTER_ACCOUNT=0
    ACTIONSDOMAIN=
    ACTIONSUSER=
    ACTIONSPASSWORD=
    ROOT_MANAGEMENT_SERVER_PORT=5723
    [INSTALLDIR=]


    More to come!


    Contributing Documentation
    Technet, Technet, Powershell Daily

    Tuesday, November 27, 2012

    SCOM - MP Viewer

    I wanted to take a moment to talk about one of the tools that I think should be in every SCOM Admins toolbox, MP Viewer. This was a tool that was originally developed for 2007 by a man named Boris Yanushpolsky who was a programmer for Microsoft. Boris left the team and it was later adapted to the 2012 platform by Daniele Muscetta a program manager, also with Microsoft.

    This is the quickest and easiest way to iterate exactly what is "built in" to any given management pack. You can download the tool from Microsoft. It needs to be run on one of your management servers. It cannot be run remotely. Once you have it on your management server go ahead and run it. It will prompt you to open a .mp file. For those of you who are not aware when you extract .msi files for management packs, by default, it put them in the C:\Program Files (x86)\System Center Management Packs directory. You will need to manually download the .mp files from the System Center Marketplace.

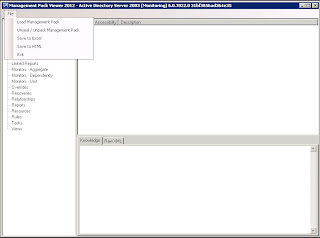
    For this example we will be exploring the Microsoft.Windows.Server.AD.2003.Monitoring.mp file. Once you have loaded the .mp file you should see something similar to below. The first think to keep in mind when using this tool is not everything in the navigation tree will have information for every management pack. These will vary depending on what type of .mp you are looking at. I will cover some of the highlights in this segment.

    As you go through the navigation tree you will a few of the things I always check are Monitors and Rules. These will provide you with the baseline of all the metrics included with this .mp file. It will give you the name of the monitor, what the target is, the category type (i.e. availability, performance, etc.), and most importantly it will tell you if the metric is enabled by default. Meaning you will start polling data as soon as you install the management pack.

    With Rules, similar to monitors you can see what the metric is, its type, the collection category and whether it is enabled by default. 

    Views are the out-of-the-box dashboard elements that have been created for this particular .mp. You will see these in the Monitoring space under the respective management pack.

    A few final things to talk about with this tool are the functions that are available with it. You can use MP Viewer to unseal .mp file, although I urge caution when doing this as you can cause problems with SCOM if you don't know what you are doing when editing the raw .xml file. You can also save the output of MP Viewer to an Excel or HTML file. I use this feature regularly when creating metric spreadsheets for clients. This gives them a place to review all of the existing metrics and determine if they are needed or not.

    Take some time and get familiar with the tool, as it will be very helpful as you work with SCOM


    More to come!


    Monday, November 26, 2012

    SCOM 2012 - Database Grooming

    So I get asked fairly regularly what database grooming settings should be. How long to keep the Operational and Data Warehouse data. How to configure the Ops database is fairly simple and can be done from the management console. In the Administration space, under Settings, Double Click on Database Grooming. The Global Management Group Settings window will appear. These are the default settings initially provided during the SCOM instillation.

    When you do your initial research with the client and determine what settings they want for data retention I would urge them to maintain 7 days of operational retention with the Performance signature set to no more than 2 days. When data is transferred to the data warehouse they do not lose any of the granular nature of the information so there is no reason to not purge the Ops database frequently. This will help improve the overall health of SCOM as well as improve performance.

    As far as data warehouse you are not limited by anything other than the size of the database on how long you can maintain retention.You can check and see what your current settings are on your data warehouse by running the following SQL command on your DW instance:
    SELECT AggregationIntervalDurationMinutes, BuildAggregationStoredProcedureName, GroomStoredProcedureName, MaxDataAgeDays, GroomingIntervalMinutes FROM StandardDatasetAggregation
    Your output should look like the following:
    The column to focus on is MaxDataAgeDays. Several of the items are set to 400 days or ~13 months. Originally if you wanted to adjust these settings you needed to do so right out of the SQL tables. Microsoft has since created a command line tool called the Data Warehouse Data Retention Policy tool or dwdatarp.exe which is available for download from Microsoft.

    I would spend some time getting familiar with this tool and with the different datasets that exist in SCOM. You will want to take this information and discuss with your client what data is of value to them. You may get the answer "all of it is important". If this is the case I would be clear with them on what each dataset is and if they capture all of it for X days this can dramatically change the amount of space required. Kevin Holman has a great blog on what all this tool can do.

    This is a good example of doing a little planning up front with the client will save them a lot of headaches down the road long after you are gone.


    More to come!