Showing posts with label SCORCH 2016. Show all posts

Wednesday, May 24, 2017

SCORCH 2016 - Protecting Active Directory Security Groups

So last year I did a fun segment for SCOM on How to Monitor Domain Administrators Group to detect unauthorized modifications to the Domain Admins, Schema Admins and Enterprise Admins groups in Active Directory. Now that we have SCORCH setup in our lab its time to take it to the next level. Once SCOM detects the change we can use SCORCH to disable the offending account, remove it from the security group and make a notation as to why the action was taken.

Modifying the Rule:
First thing we need to do is make a change to the rule we created in SCOM so SCORCH knows what to look for. In Authoring > Rules do a search for the rule you created. Right Click and select Properties. When the Properties window opens go to the Configuration Tab. Under Responses select Edit

In the Alert - Properties Click Custom alert fields

In Custom Alert Fields add DAModAdd to Custom field 1 and $Data/Params/Param[1]$ (the distinguished name of the user who was added to the group) to Custom field 2. This will tell SCORCH what and who to look for so it will kick off the Runbook when this alert is generated. Click OK to everything and you are done with SCOM for the moment.

Creating the Runbook:
This is what the Runbook looks like:
 
We are monitoring SCOM for a specific alert. It then pulls the user data from the alert and disables the account. Then we make a notation in the account as to why it was disabled. It is removed from the Domain Admins group and we then update the alert in SCOM. I also used two variables which I will get to in a moment.

Monitor Alert:
We are looking for DAModAdd from SCOM so we want CustomField1 Equals DAModAdd

Disable User:
For Disable User you need the distinguished name which we setup in the parameters of the SCOM Alert earlier.

Update User Properties:
The same custom field used again to identify the user to change. Then added Notes from Optional Properties. In the notes field I put (you can put whatever you like):
Unauthorized Group Access! User disabled by Orchestrator {Date}

Where date is the first variable I added. I invoked the NOW() wildcard in order to date stamp the account so you could tell when the account was disabled.

Remove User from Group:
Now we pull the user out of Domain Admins.
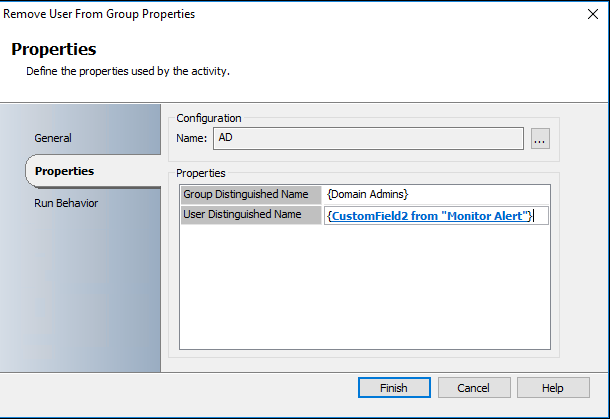
The second variable I created was {Domain Admins} as I plan to use it in later Runbooks.

Note: At the time of this writing there is a bug in the Active Directory Integration Pack. Administrators are reporting an error when trying to add or remove a user from an AD Group. The error "unknown exception caught" shows up in Runbook Tester and fails at this step. The only known fix that I was able to find is to either roll back to a previous version of the ADIP or use the PowerShell IP with the following syntax and variables described earlier:

Remove-ADGroupMember -Identity "{Domain Admins}" -Members "{CustomField2 from "Monitor Alert"}" -Confirm:$False

If someone finds a fix for this please feel free to share it in the comments. 

Update Alert:
Finally we update the SCOM alert. Some people like to just close the alert at this point but I would rather change the Resolution State and close it myself. I created a custom state called User Disabled. You can refer to Creating and Setting Resolution States for help with that.

Go ahead and run it in Runbook Tester. When it executes we should get a disabled user with this in the notes:

And an updated alert

As we did with the monitoring of Domain Admins, Schema Admins and Enterprise Admins you can do the same here. Just change the Custom field 1 to:

SAModAdd - User Added to Schema Admins
EAModAdd - User Added to Enterprise Admins

From there you can create the appropriate Runbooks.


More to come!

If you like this blog, give it a g+1

Monday, May 22, 2017

SCORCH 2016 - Integration Packs

Now that we have SCORCH installed and ready to create some Runbooks lets go ahead and setup the System Center Integration Packs so that we can plug SCORCH into some of the tools in our environment like SCOM and SCCM. You can download the IPs from Microsoft here. Extract them to your hard drive and you should have several .oip files.

Now that we have them downloaded it's time to register them. Double check the .oip files and make sure they are not set to Read-only as this may cause issues later. Open the SCORCH Deployment Manager.

Expand the Orchestrator Management Server and Right Click on Integration Packs. Select Register IP with the Orchestrator Management Server...

The Welcome to the Integration Pack Registration Wizard will start. Click Next

On The Select Integration Packs or Hotfixes screen navigate to where you extracted the .oip files and select the ones you plan to use. I chose SCCM, SCOM, SCSM and AD. Click Next

Confirm your choices and Click Finish

Accept the EULA times however many IPs you selected

Now you should see all of the IPs that you installed.

Right Click on Integration Packs. This time choose Deploy IP to Runbook Server on Runbook Designer.

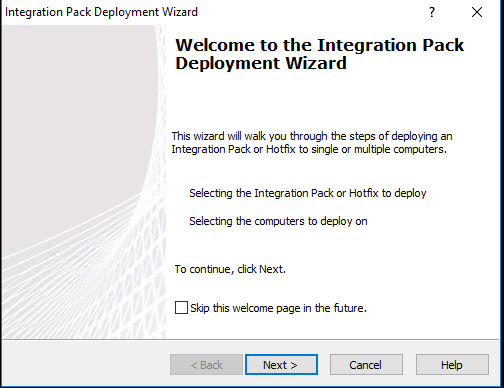
This time the Welcome to the Integration Pack Deployment Wizard will start. Click Next

Select all of the new IPs you need to deploy. Click Next

Enter the name of the server that has Runbook Designer installed on it and Click Add. Then Click Next

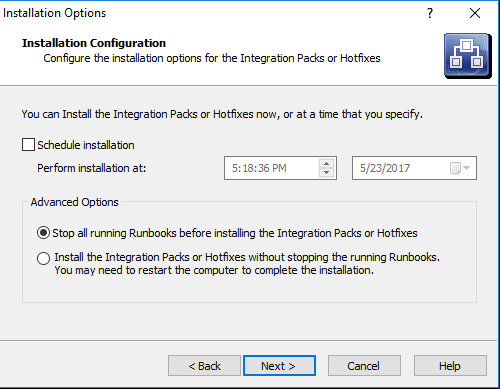
You can schedule a time when the SCORCH server is not busy or in our case we have a new server with no active Runbooks so we are going to install now. Click Next

Review your install choices and Click Finish

The deployment will walk through all the chosen IPs 

When it is finished you should see in the logs

Close Runbook Designer and reopen it. You should now see the new IPs under Activities

Last thing to do is make the connection between SCORCH and the other Components. In Runbook Designer Select the Options drop down and select one of the IPs.

In the Connection Wizard Click Add and populate the connection with your server data and account credentials to be used to make the connection. Be sure to Test the connection to ensure it will work. Click OK
 

Click Finish

Repeat this step for all IPs and you are ready to start making some Runbooks!


More to come!

If you like this blog, give it a g+1

SCORCH 2016 - Installation

So I have been wanting to do segments on Orchestrator for a while now and I thought no better time than the present. So lets begin.

Prerequisites:
There are a few things that need to be setup before we begin.

Service Accounts/Groups
You need two service accounts and a security group
  • SCORCHAdmin - This will run your SCORCH management, runbook and be your admin account. This account needs to be local admin on all SCORCH servers
  • SCORCHSql - This will be your SQL service account
  • SCORCHUsers- This will be your global security group to give user access to SCORCH. This group needs to be local admin on all SCORCH servers
Servers
You will need two servers, SCORCH Runbook Server and a database server. They will need the following:

       1. SCORCH
    • 1 GB Ram (min)
    • .net 3.5
      • Add-WindowsFeature NET-Framework-Core
      • Add-WindowsFeature NET-Framework-Core -source D:\sources\sxs
    • IIS Role (setup will add this if not installed previously)
    • .net 4.0 
    • .net 4.5
       2. SQL
    • Install SQL Server 2014 SP1 (for additional information please see SQL 2014 SP1 - Installation)
      • Database Engine Services
      • Full-Text and Semantic Extractions for Search
      • Reporting Services - Native
      • Management Tools (basic and complete)
Installation:
The installation is one of the more straight forward System Center installs. After you extract the install files go ahead and run the SetupOrchestrator.exe file and Click Install

You can enter a product key or run as evaluation edition. Click Next

Accept the EULA and Click Next

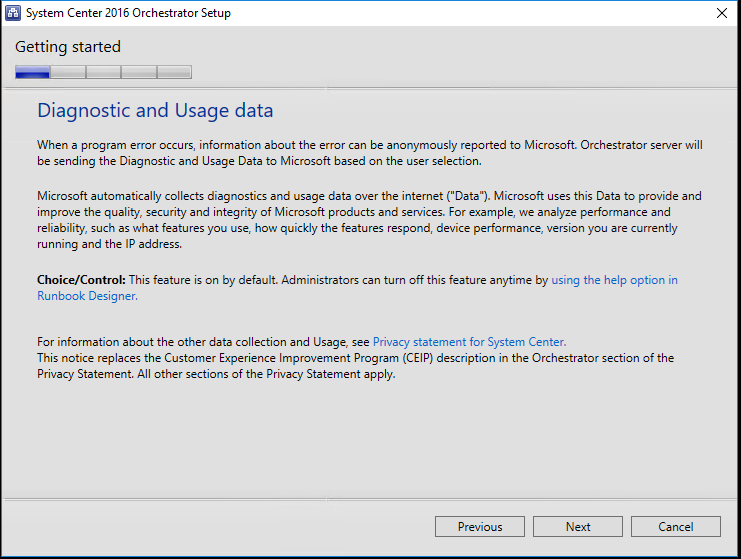
If you want to disable this I will show you how at the end of the segment. Click Next

We are going to install all the features. Click Next

I intentionally left out the IIS roles to show that it will install any prerequisite components if needed. Select any missing features and Click Next

Installing Prerequisites

If No prerequisites are missing or post install Click Next

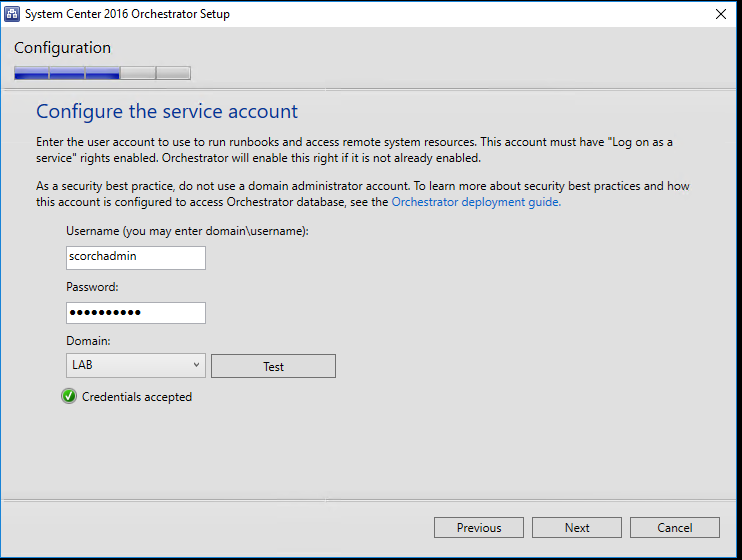
Enter the SCORCH Admin account you created earlier and Click Text. If all is well Click Next

Enter the Server\Instance of the second SCORCH server when you installed SQL. Depending on how you setup the user accounts you may need to select SQL Authentication and enter the SQL account that has access. Click Test Database Connection. If all is well Click Next. Otherwise you will need to troubleshoot the connection

Enter the database name you want to use. I kept the default. Click Next

Enter the SCORCH User group created earlier and Click Next

I kept the defaults. Click Next

Click Next

Dealers choice. Click Next

Dealers choice again. Click Next

Review the installation settings you selected and Click Install

When the install is finished Click Close

When the Runbook Designer opens there is one final step if you want to disable Diagnostic and Usage Data. Click Help > Diagnostic and Usage Data.. Select No and Click OK

All Finished!


More to come!

If you like this blog, give it a g+1