Showing posts with label SCOM 2012. Show all posts

Friday, May 19, 2017

SCOM 2016 - Deployed Agent on Domain Controller Grayed Out

So I have been going through the process of setting up SCOM 2016 and came across an interesting issue. I deployed the SCOM agent to my Domain Controller using the install as other account method which, in my opinion is the preferred method. Agent installed successfully and reported back to SCOM as healthy. A short time later it went gray on me.

OK, this happens sometimes. I ran the repair using the same account (maybe I fat fingered it). Repair was successful but agent was still gray. I did an uninstall and re-install, watching it the whole time. Came back as green then a short time later it was gray again. Checked on the domain controller. Agent was running and pointing to the correct management group.

After some digging I came across this KB article which explains what is happening. In short when you use the install as other account method the service itself does not actually run using the Domain Level account specified. It only uses that account to do the physical installation and configuration. Once installed the service runs as Local System or NT Authority\System. At some time between 2012 and 2016 the security approach to agent accounts changed an according to the article "only the NT AUTHORITY\Authenticated Users security principal is allowed access to the Health Service. But when the Active Directory is hardened, or the agent is misconfigured, the Local System account cannot authenticate through the Authenticated Users security principal, therefore the agent cannot process Health Service configuration information."

So at this point there are two ways to fix this. Create a Run-As Account and deploy that to all your domain controllers or use the HSLockdown tool. I only have one DC in my lab so I opted to do the latter.

On your Domain Controller navigate to C:\Program Files\Microsoft Monitoring Agent\ Shift-Right Click on the Agent folder and select Open Command Window Here. Type hslockdown.exe /l this will list all users authenticated to access the management group.

Voila! Access has been denied to NT Authority\System. So we need to grant access to it in order to fix this. Type hslockdown.exe /a "NT Authority\System" 

You will be prompted to restart the Health Service in order for the change to take effect.

Give it a few minutes to start reporting in again, and there you go!

It's strange that I have installed the agent on literally hundreds of Domain Controllers and never had to do this before... Odd...


More to come!

If you like this blog, give it a g+1

Friday, June 17, 2016

SCOM 2012 R2 - How to Monitor Domain Administrators Group

So one of the requests I get fairly regularly when working with SCOM is can SCOM alert when users are added to the Domain Administrators group. The answer is YES, and as it turns out this is quite an easy thing to accomplish. It is very similar to the blog I wrote a while back on How to Generate Alerts from Event Logs. The major difference is we will be doing this with a Rule, not a Monitor.

Build the Custom Rule:
Open up the SCOM console and go to Authoring > Management Pack Objects > Rules. In the Tasks window Click Create a Rule

When the Create Rule Wizard runs, drill down to Alert Generating Rules > Event Based and Select NT Event Log (Alert). Select a custom management pack, or create one if you don't have one yet. Click Next

Give it a unique name similar to below. I worded it this way as I will also setup a rule to monitor when users are removed from this group (discussed later in this segment). Add a clear description as well. Rule Category is Alert and be sure to set Windows Domain Controller as the Rule target. Check Rule is enabled and Click Next.

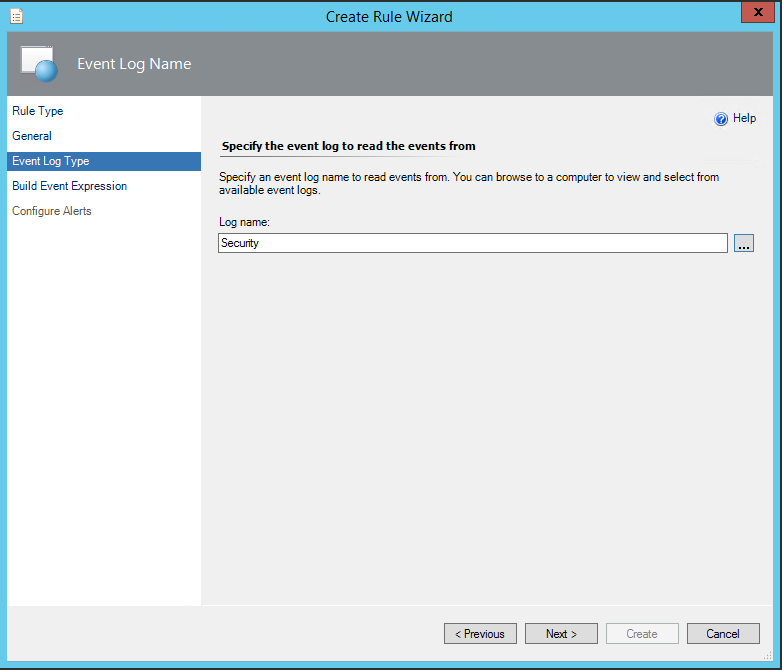
For Event Log Name click the ... on the right. Be sure one of your domain controllers is in the Computer field. Then select the Security log. Click OK

Log name should read Security. If not repeat the previous step. Click Next

For Event ID you want 4728 and change Event Source to Parameter 3 and equals Domain Admins. Click Next

I modified the Alert Description a little bit to pass through additional information. I also changed the Priority to High. Click Create

Give it a bit of time to propagate throughout your environment and test it by adding someone to the DA group.

This process can be expanded to removing users from the Domain Admins group as well as adding / removing from Schema Admins and Enterprise Admins by using the information below:

Domain Admins
Security Group Alert - User Added to Domain Admins
Event ID = 4728
Parameter 3 = Domain Admins

Security Group Alert - User Removed from Domain Admins
Event ID = 4729
Parameter 3 = Domain Admins

Schema Admins
Security Group Alert - User Added to Schema Admins
Event ID = 4756
Parameter 3 = Schema Admins

Security Group Alert - User Removed from Schema Admins
Event ID = 4757
Parameter 3 = Schema Admins

Enterprise Admins
Security Group Alert - User Added to Enterprise Admins
Event ID = 4756
Parameter 3 = Enterprise Admins

Security Group Alert - User Removed from Enterprise Admins
Event ID = 4757
Parameter 3 = Enterprise Admins

In the next segment I will show you how to protect the security groups using SCORCH.

More to come!


If you like this blog, give it a g+1

Tuesday, June 7, 2016

SCCM 2012 - How to Deploy SCOM 2012 Agent

So now that we have SCCM 1511 up and running I wanted to setup up a deployment for the SCOM agent. This is actually a very simple application to setup.

Gather SCOM Agent Files:
So the first thing we need is the SCOM Agent files. On your SCOM server navigate to %ProgramFiles%\System Center 2012\Operations Manager\Server\AgentManagement. You will see AgentLogs, amd64, UnixAgents and x86. Since all the servers in my lab are 64bit I am going to copy the amd64 folder over to my app catalog on my SCCM server. I plan to cover multi-platform deployment in the next segment.

Create the Application:
Since this is an .msi we will be building an Application. On your SCCM server go to Software Library > Application Management > Applications. Right Click on Applications and choose Create Application. Type is .msi and you will need to browse to the share location of the MOMAgent.msi. Click Next

If you copied the entire amd 64 folder, all of your install files should be discovered successfully. Click Next

I like to be fairly detailed when building Applications. It makes it easier to manage them in the long run. Fill out the Application information as you feel is necessary. For Installation program you should fill it out as follows (updating the yellow text for your enveronment):

msiexec /i momagent.msi /qn USE_SETTINGS_FROM_AD=0 USE_MANUALLY_SPECIFIED_SETTINGS=1 MANAGEMENT_GROUP=Management Group Name MANAGEMENT_SERVER_DNS=FQDN of RMS Server ACTIONS_USE_COMPUTER_ACCOUNT=1 AcceptEndUserLicenseAgreement=1

Click Next

Review the summary and Click Next

Wait for it...

And Done!

One final step. Open the SCOM console and go to Administration > Settings > Security. Change the radio button to Review new manual agent installations in pending management view and Check Automatically approve new manually installed agents. This will allow all newly installed clients to be accepted into the Management Group without any administrator intervention.

Distribute the content and deploy to your servers collection and you are all set!

More to come!


If you like this blog, give it a g+1

Monday, November 11, 2013

SCOM 2012 - Configure ACS Reporting

In Deploying ACS we discussed how to install and configure Audit Collection Services. Now we will discuss how to setup the reporting services for ACS so you can utilize the compiled data in a useful way. This requires that you have Reporting Services installed either locally or on a remote machine. If you have not setup Reporting Services refer back to my previous segment SCOM 2012 - Web & Reporting Services Install.

So the first thing we need to do is create a temp folder called c:\ACS. This will be deleted later but it will hold the install files. Next copy the contents of \ReportModels\ACS to the newly created temp ACS folder. In this folder there should be an .exe called ReportingConfig.exe. If it is not there go to \SupportTools and find it under your respective processor. Copy the file back to c:\ACS.

The contents should look like this:

From an administrative command prompt, run the following command:
UploadAuditReports "<AuditDBServer\Instance>" "<Reporting Server URL>" "<path of the copied acs folder>"

For example: UploadAuditReports "myAuditDbServer\Instance1" "http://myReportServer/ReportServer$instance1" "C:\acs"

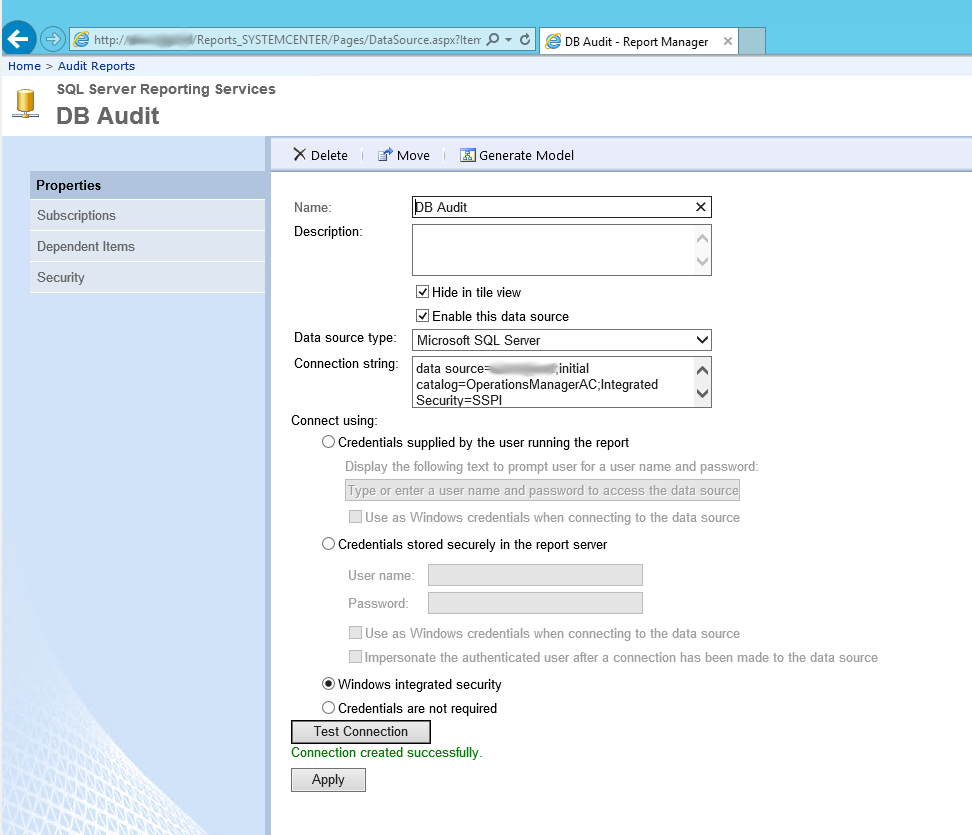
This example creates a new data source called Db Audit, uploads the reporting models Audit.smdl and Audit5.smdl, and uploads all reports in the acs\reports directory.

Once you get back to a command prompt you can close this window. Open up a web browser and navigate to your reporting page. It should be http://servername/reports_instancename. You will see the newly created Audit Reports. Click on it.

In Audit Reports change the sort to Details View

Right Click on DB Audit and Manage

Make sure Windows integrated security is selected and Test Connect. If you are able to connect Click Apply

Back in the SCOM console go into the Reporting Space. You should see the new Audit Reports Section.

Note: You may have to close the console and re-open it for this to to take effect. 

You can now remove the c:\ACS folder as it is no longer needed.


More to come!


If you like this blog give it a g+1

Friday, November 8, 2013

SCOM 2012 - Deploying ACS

You may find yourself on an engagement where the client is more security conscious they might request that you set up Audit Collection Services. ACS provides a means to collect records generated by an audit policy and store them in a centralized database. By default, when an audit policy is implemented on a Windows computer, that computer automatically saves all events generated by the audit policy to its local Security log. This is true for Windows workstations as well as servers. In organizations that have strict security requirements, audit policies can quickly generate large volumes of events.

Installing ACS:
On the SCOM server you intend to install ACS go ahead and run the System Center executable as an administrator. You will see the familiar install launch screen. Click Audit Collection Services

Click Next

Accept the EULA and Click Next

Select Create a new database and Click Next

Leave this as the default and Click Next

For our purposes on this install we are going to use a existing database instance which is on a remote database server. Enter the machine name and instance. You can also change the name of the database if you wish. Click Next

We used Windows Authentication. Click Next

If you have specific directories you can modify them here, otherwise Click Next

You can adjust this to fit your needs. Keep in mind the longer you store ACS data the larger the database will grow. Click Next

Dealers Choice. Click Next

Click Next

The wizard will configure the ACS Collector.

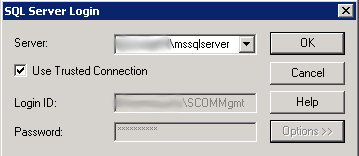
After a time you will be prompted to log in with credentials that have access to the database instance.

 Success! Click Finish

You can log into your SQL server and validate that the database was created successfully.

On the SCOM server you will see the Operations Manager Audit Collection Service has been installed. It should be started at this point. If it is not, go ahead and start it.

Enable ACS Forwarders:
So now that the ACS install is finished we need to let our servers know that they should be forwarding security audit data to the ACS machine. Open up the Operations Manager console. In the Monitoring Space expand out Operations Manager, then Agent Details then click on Agent Health State. In the Agent State pane in the upper right, select the server you want to enable ACS on (you can select multiple servers by holding CTRL or SHIFT). In the task pane under Health Service Tasks Click Enable Audit Collection

You can modify the credentials used or just use the default Run-As account. Click Run

You can monitor the install progress. When the install is finished Click Close

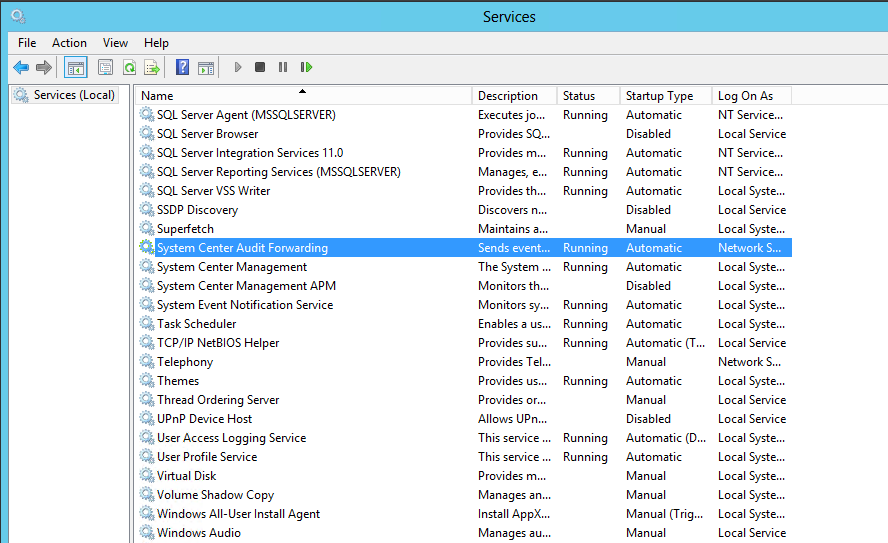
You can validate that Audit Forwarding is running by logging into one of the client machines and checking for the service.


In the next segment we will cover configuring ACS Reporting

More to come!

If you like this blog give it a g+1

Friday, March 8, 2013

SCOM 2012 - How to Generate Alerts from the Event Log

As a continuation of how to set up some custom monitors I wanted to expand out the previous segment on How to Generate Alerts from a Log File and talk about how to create an alert from an event in the Event Logs. If you are given a choice monitoring the event log is preferable to monitoring a log file as the results tend to be a bit more consistent, at least in my experience.

First go to the Authoring space.Then go to Management Pack Objects then Monitors. Go ahead and scope the list for Windows Computers. Expand out Windows Computers and Entity Health. Right Click on Availability and select Create a Monitor then Unit Monitor...

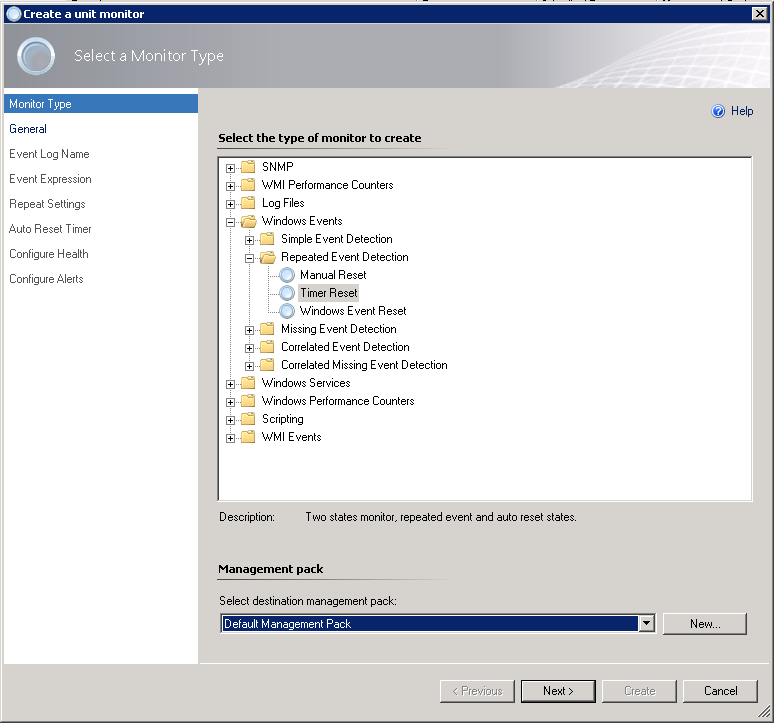
When the Create a unit monitor wizard opens up expand out Windows Events then Repeated Event Detection (we did Simple Events last time so this time I want to show you how to look for repeated events). When you get to Repeated Events you again have three choices:
  • Manual Reset - 1 State, Alert - Manually resolve
  • Timer Reset - 2 State, Alert and Auto Resolve (Time Based)
  • Windows Event Reset - 2 State, Alert and Auto Resolve
For this example we are going to use Timer Reset. Select a management pack and Click Next

In General Properties, go ahead and give the monitor a name, uncheck Monitor is enabled and Click Next

In Event Log Name select the event log you are targeting, in our case it will be Application. Click Next

For Build Event Expression enter in the ID of the event you will be looking for, and the Event Source. Click Next

In the Repeat Settings change the Counting Mode: to Trigger on count, and the Compare Count to 10. Then set the interval time to 5 Minutes. This will go out and check the log for your event and if it finds more than 10 failures in 5 minutes it will generate an alert for this event. Click Next

Next set your Auto Timer Reset to 2 minutes. This means the alert will self resolve after two minutes and close. Click Next

Now we want to configure the health settings for failure and healthy. Change Repeated Event Raised to Critical and Click Next

For Configure alerts go ahead and Check Generate Alerts for this monitor. You can configure your alert and the description as required for your particular situation. Click Create

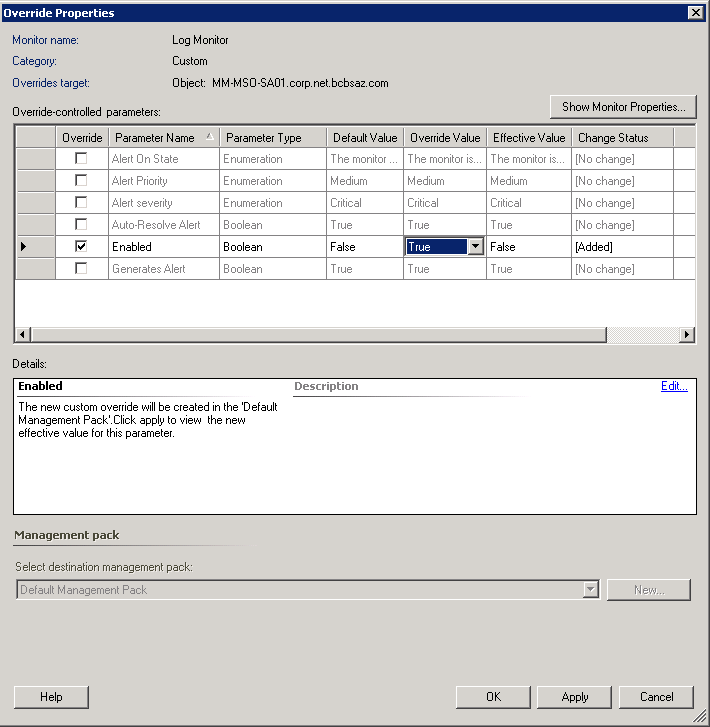
Now we need to enable the monitor for your test server. Right Click on the Monitor and select Overrides, then Override the Monitor then For a specific object of class: Windows Computer. You will be asked for the computer name, select it and Click OK. In the Override check the Enabled check box and change the Override Value to True. Click Apply

Now in Windows Server 2008R2 - How to Create an Event Log Event I showed you how to manually generate events. You can use this to create 10 failures and make sure the monitor is working correctly.


More to come!

Like this blog, give it a g+1