As we did in SCCM 2012 Install Part 1 we covered the prerequisites needed for the install.
- .NET 3.5
- .NET 4.0
- Background Intelligent Transfer Service (BITS)
- IIS6 WMI Compatibility
- Remote Differential Compression (RDC)
Open Server Manager
Click on Features
Click Add Features
Check the box for .NET Framework 3.5.1 Features
You will be prompted to install:
Web Server (IIS) and Windows Process Activation Service
Click Add Required Role Services to continue
On Web Server (IIS) Click Next
On Select Role Services Click Next
On Confirm Installation Selections Click Next
For .NET 4.0
If you don't already have a copy of .NET 4.0 you can get it from Microsoft.
Run the .NET 4.0 executable
Check I have read and accept the license terms
Click Install (this will take a few minutes depending on the specs of the box)
Click Finish
For BITS
Open Server Manager
Click on Features
Click Add Features
Check the box for Background Intelligent Transfer Service (BITS)
You will be prompted to install:
Web Server (IIS) Management Tools and Remote Server Administration Tools
Click Add Required Role Services to continue
On Web Server (IIS) Click Next
On Select Role Services Click Next
On Confirm Installation Selections Click Next
For IIS6 WMI compatibility
After BITS is installed you will need to add one additional sub-feature to IIS, the IIS6 WMI Compatibility.
In Service Manager
Click Roles
Click Web Server (IIS) under Roles Summary
Scroll down to Role Services and Click Add Role Service
Scroll down and expand Management Tools, then expand out IIS 6 Managment Compatibility
Check the box for IIS 6 WMI Compatibility
Click Install
For Remote Differential Compression (RDC)
Open Server Manager
Click on Features
Click Add Features
Check the box for Remote Differential Compression (RDC)
Click Next
Click Install
One additional item to configure before we do the install is to go into your domain controller and give your secondary server full control of the System Management container in ADSI.edit. In ADSI.edit expand out the domain, then Click System. Right Click on the System Management container and select Properties. On the Security tab Click Add. Add the name of the Secondary Server then click Advanced. Edit the Secondary server and be sure to select This object and all descendant objects.
Once we have the secondary server ready to go lets log back into our Primary server and go to the Administration space, expand Site Configuration then click on Sites. Go ahead and highlight your Primary site server and Click Create Secondary Site.

The Create Secondary Site wizard will load. Click Next

Give your Secondary Site a site code, enter in the name of the Secondary Server and a Name for this serer. I left the installation directory as the default. Click Next

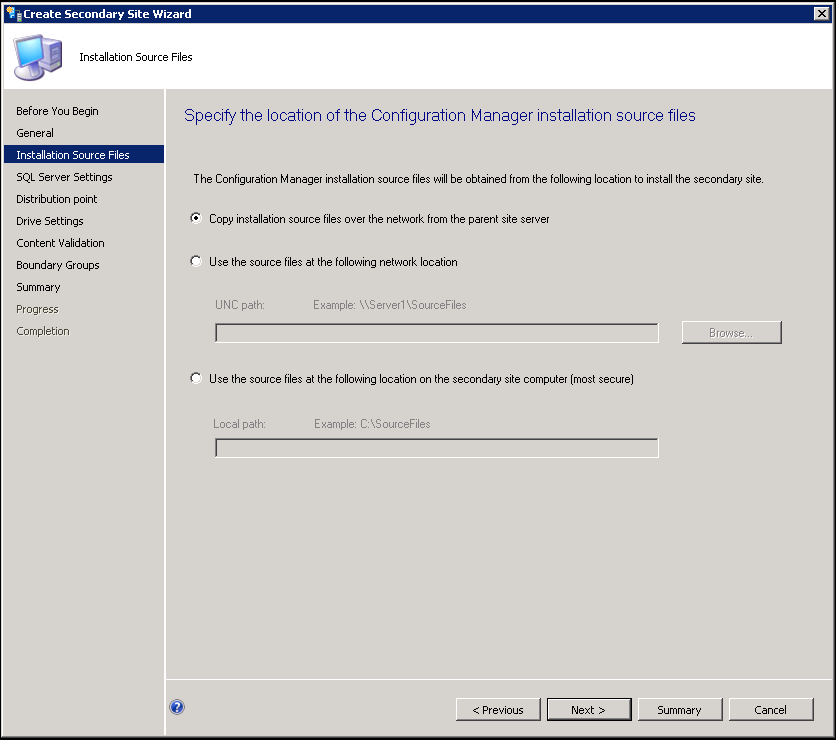
Here you can choose to have the source files copied over automatically or you can manually copy them over. I leave this as the default. Click Next
This is a small server so I am going to use SQL Server Express on in instead of installing a full blow version locally. Click Next

Click Next

Click Next

Click Next

I already had a boundary group setup for this server so I added it. If you do not have one ready you can Click Create and make a new one. Otherwise you can click Click Next

Review the settings and Click Next

You will get a confirmation that the wizard completed successfully. Click Close.

From here you can monitor the installation progress. Highlight your new secondary server and click Show Install Status.

This will give you a step by step tracker on how the install is doing.

Microsoft also provides a handy tool to keep an eye on the install logs. In the SCCM install files you will find SMSSETUP\TOOLS\CMTrace. This is a handy log analyzer which will tell you what if anything during the install failed.

The logs to watch on your Primary server are:
C:\ConfigMgrSetupWizard.log
C:\ConfigMgrSetup.log
C:\Program Files\Microsoft Configuration Manager\Logs\sender.log
Between the two tools you should have a pretty clear understanding why if anything does fail during the install.
More to come!
If you like this blog, give it a g+1


